15 JAN 17: Left door seal, 45-5 step 10 (L), wet send/clear
carbon fiber: 6.75 hours
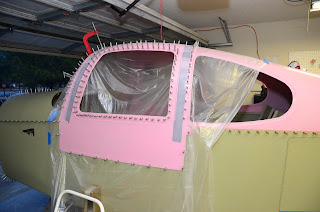
Trimmed the left door window opening. Just like the outer perimeter, a few places
delaminated while trimming. I believe
this will be a regular occurrence while trimming the doors. If I would have thought ahead a bit, I would
have focused on ensuring a good amount of epoxy on the inboard side of the
mating surfaces as you trim the outboard side away. Continued to fit the door seal, however I’m
done with that for now. I’ll wait until
I have the door latch installed to get the seal fit to 100%. I shifted gears a bit and decided to play
around with some of the carbon fiber pieces I received from the good folks at
Aerosport. I want to wet sand/clear coat
the pieces as to be able to enjoy the beautiful carbon fiber look, but don’t
have any experience shooting/sanding clear coat. I decided to use the lower console side
pieces – if I jacked those up, at least they wouldn’t be too visible! I lightly scuffed, wiped with alcohol, tacked
clothed, then shot. Turned out pretty
well. Got a few dust spots, but that is
expected as I’m shooting at the end of my garage and it is absolutely destroyed
with dirt after years of building – especially now in the fiberglass
phase! Hard to get a good pic, but looks
pretty good:

I’ll give that 24 hours, wet sand those marks and shoot
another coat of clear. I ended the
evening by adding epoxy to a few spots of the door gutter that I will have to
build up – where the gap is too large between the gutter/seal and door
edge. I was kind of intimidated by
beginning the fiberglass work – had zero experience with it – but I’m enjoying
it actually. Yeah, it is dirty, stinky,
and messy as hell at times, but it’s almost artistic in a way - creating the
shape/look/final product that you desire.
The forgiving nature vs. metal work is also very nice! Mess up here and sand/fill your mistake away,
unlike metal work where you could have shot 200 perfect rivets and all it takes
is one slip to mar your beautiful work.
I definitely miss shooting rivets, but this phase is a bit more
care-free. Mind-numbing for sure at
times, but care-free ;)
16 JAN 17: Wet sand, polish carbon fiber: 4 hours
Well, we build EAB to learn, and we learn from
mistakes, right?! Not really a learning
moment, as I already had the information - I just rushed/was complacent. After wet sanding the dust spots out of my
clear-coated pieces, I decided to shoot another coat of clear. Here is where the rush/complacency comes
in. 1) I didn’t clean the area properly –
still had some (too much) fiberglass dust hanging around, and 2) The bigger
issue of the two, I shot both pieces side by side on the table. Well, I shot a tack coat on the first piece –
no problem – but then shot the tack coat on the piece next to it. This kicked up a bunch of dust onto the first
piece I just shot. Holy cow – it looked
about 10x worse than the first round of clear.
Oh well… Let it cure, wet sand
1000, 2000, then 2500. I then polished
and waxed using my DA buffer. A lot of
work for a few small pieces you will barely see, but I did it more for my
learning of the techniques than anything.
Again, hard to get good pics, but the finished product is very nice:

I know some people do not like the look of the raw carbon
fiber. I love it. Yes, you can have too much, but in
moderation, I think it really sets off the interior. I will keep all the Aerosport interior –
overhead, panel, lower/center console raw carbon fiber. Close up:
18 JAN 17: Started door handle/latch assembly: 5.75 hours
5.75 hours worked today and I really didn’t get
anything done – ha! Started on the
infamous handles/latches today. I’ve
read a lot about doing this – how it’s fairly confusing, difficult, etc. To add to the confusion, I’m adding the
PlaneAround 180* latch and the Aerosport low-profile door handle, so I’m
following 3 sets of instructions at the same time. Fortunately, like all RV builders, I have
many that have gone before me. I review
the sites of fellow -10 builders Ed Kranz (http://www.goodplaneliving.com) and
Justin Twilbeck (http://buildingrv10.blogspot.com),
and -10 builders and friends Mike and Sarah (http://mikeandsarahrv10.blogspot.com)
more than the plans at this point! This
makes some of the more confusing parts/additions exponentially easier. I especially appreciate Ed’s videos of the
Aerosport products. Half of today’s time
in the shop was just sorting through all of the parts required. Here are the Van’s, PlaneAround, and
Aerosport parts all separated for each door latch:

Only got the holes rough cut. Do not have the door locks yet - didn’t at
the time, do as I’m writing this ;) – so this is where I will stop for now on
the door latches. Just like the outer
perimeter delaminated, so did this door pocket (actually, I don’t think it was
ever bonded when I glued the door halves together), so I squeezed some epoxy
back in there and clamped together.
Hopefully I won’t have to do it again when I sand to final size, but I
probably will!
21 JAN 17: 45-10, steps 1-4: 4.25 hours
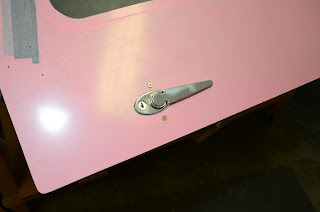
Temporarily assembled and final-drilled the door
handle assemblies:
Riveted the C-1006A handle plates and C-1006D handle
face plates to each other:
Cut the WD-1022 handles and C-1007 pins according to
the Aerosport low-profile handle instructions.
Installed nutplates inside the WD-1022 handles – a bit tricky as the
nutplate is inside of the handle. I
taped the nutplate to a flat tip screwdriver.
Worked well:
22 JAN 17: 45-13, steps 1-2: 5.25 hours
Some days you feel like you accomplish a lot, some days, not
so much… Over five hours and not even 2
whole steps completed. Part of it was my
fault – installing the wrong pins in the wrong areas…SEVERAL times… – but generally
it just took a lot of work to get everything in the handles to work nice and
smoothly. Got the left handle finished
and the right handle close – just have to grind the locking pin channel for the
larger Aerosport pin.


