24 SEP 15: Page 31-8 steps 7 (top skin), 12-3 1-4: 5 hours
Dimpled forward fuse top skin. Jumped back to the empennage and fit the
rudder fairings. I wanted to make the
lower fairing removable because of the aft position light, so I installed
nutplates. I used an aluminum backing
strip in hopes that the nutplates do nut loosen in the future:
Took longer than expected, but I’m glad I did
it. Turned out nicely:
25 SEP 15: Page 12-3 1-4, 12-2 6-9: 5.5 hours
Finished the rudder fairings. Added the backing
strip to the top fairing even though it isn’t removable. Don’t think it was really necessary. Both fairings installed:
26 SEP 15: Page 30-4 1-2, 9-15 8-9, 12-2 1-5, 29-18 2, 29-20 1: 11.25 hours
Bolted the steps into the fuselage. Inside:
Outside:
Continued finishing the empanage control surfaces. Installed the elevator counterweights:
Installed the elevator fairings:
Finished riveting the fuse side skins:
Installed the left cabin floor panel. This took way longer and was more difficult than
I had expected. A huge hand workout
pulling all those pop rivets!
27 SEP 15: Page 29-20 step 1, 29-21 step 2: 5.5 hours
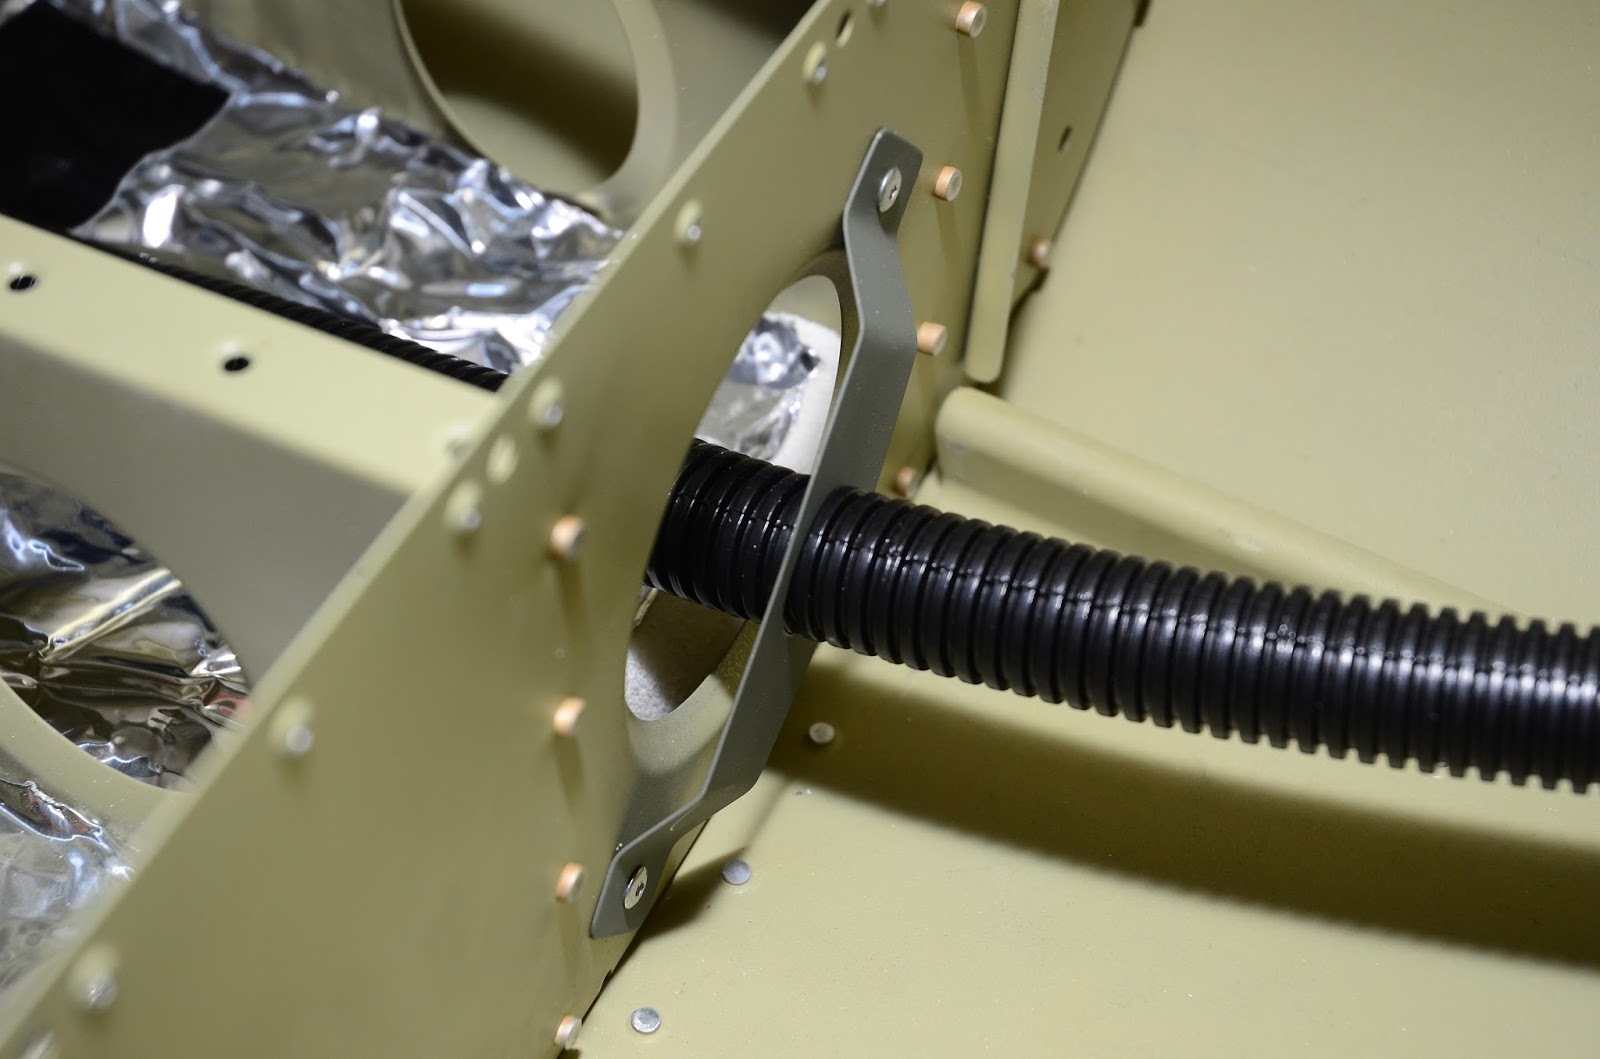
Installed the right cabin floor panel. Began to install the WD-1021-L/R-PC landing
gear mounts – no pics.
28 SEP 15: Page 29-21 step 2:
3 hours
Finished installing the landing gear mounts. Boy was this fun installing all the bolts in
between the spars! Nothing like leaving
you mark – that’s some blood:
29 SEP 15: Page 29-22 step 1, 31-8 step 15: 3.5 hours
Riveted the F-1088-L/R forward fuselage ribs to the
side skins. I am SO glad to say that
section 29 is now complete!!!!!!!!!!!!!!!!!
Riveted the F-1044B, D, E, and F angles and F-1044C spacer to the
F-1044A forward fuse rib:
1 OCT 15: Page 38-2 step 1-5:
3.5 hours
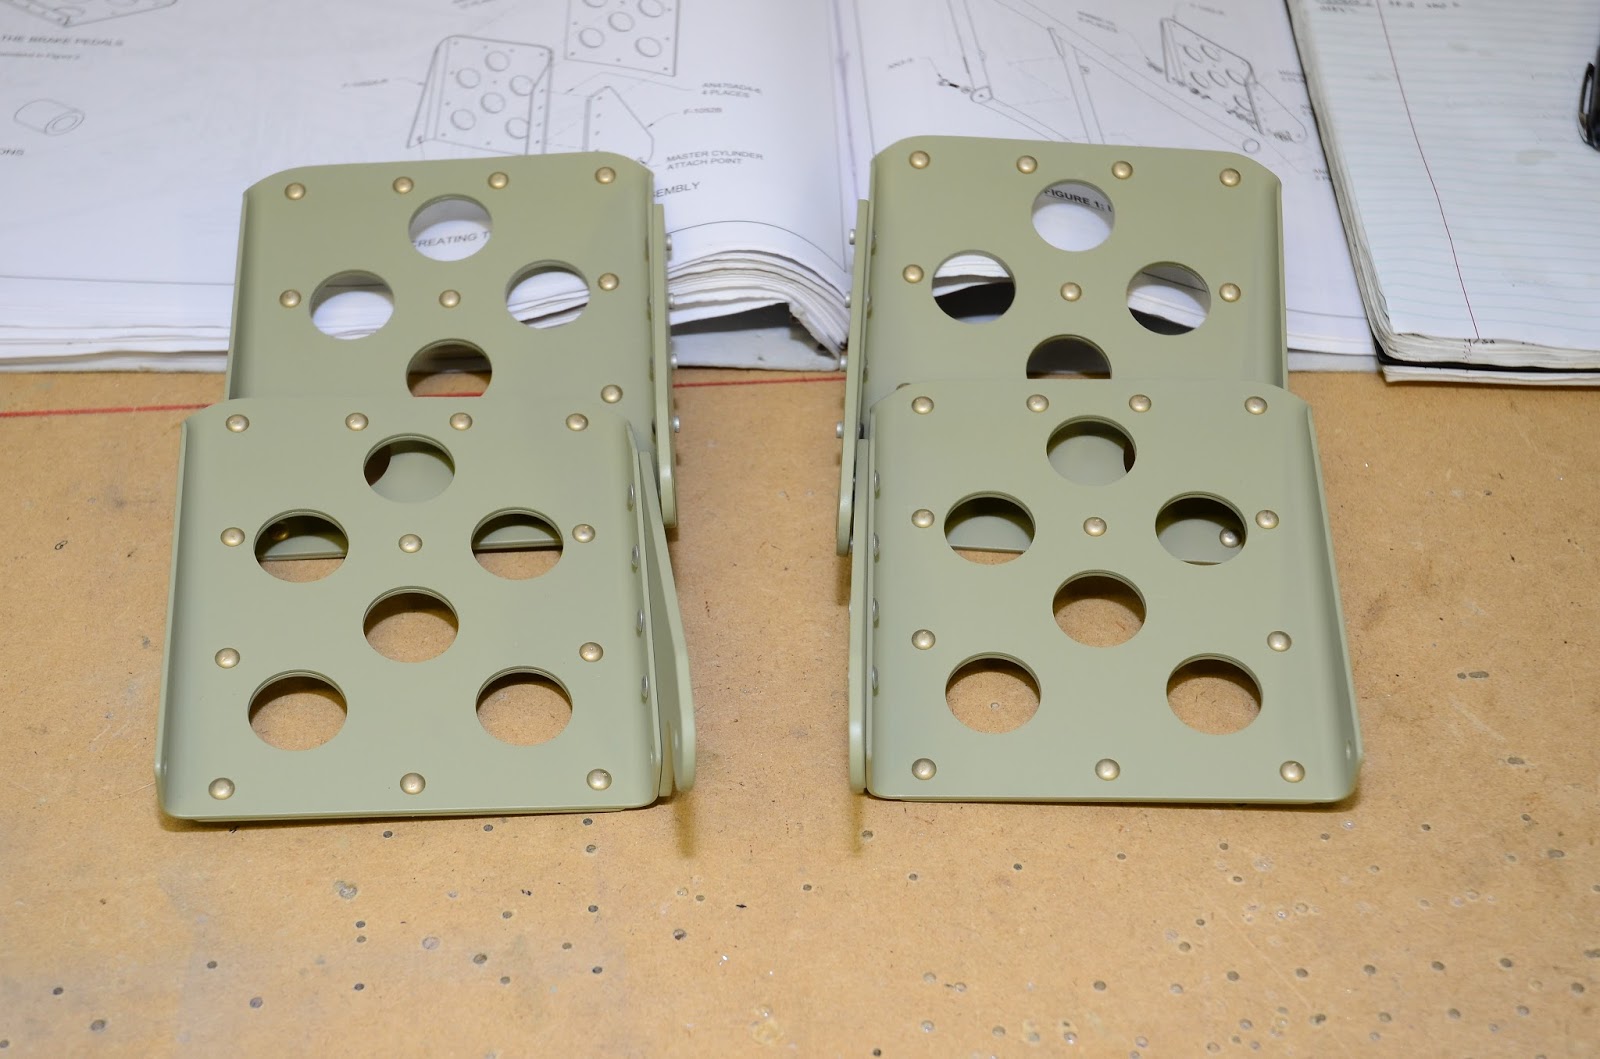
Deburred the F-1052 brake pedals, cut four F-1097
spacers, match-drilled and deburred the pedals – no pics.
2 OCT 15: Page 38-4 steps 1-4, drill out tail cone
rivets/prime: 4 hours
Cut and fit the F-6115 pedal bearing blocks to the
F-1039B bearing block mount plates.
Bolted the blocks to the fuselage to test fit the pedals:
Everything lined up nicely:
So keeping the theme of going back to previous steps…I
brought the tailcone back home from the hangar in prep for attaching to the
fuse. First I had to correct a little
issue… Back when I was riveting the tail cone, I was only priming the interior
of the skins. After it was riveted
together I primed the outside. While
priming, I noticed some plastic in the overlap of the top/side skin that I did
not remove completely. Not wanting to
have the plastic in there, I had to drill out all of the rivets attaching the
top skins to the longerons. Didn’t take
long:
You can see the unprimed seam. In actuality, there was very little plastic
stuck in the seam. But any was too much,
so I’m glad I fixed this issue:
Seam primed and ready to put back together:
3 OCT 15: Page 32-2 steps 1-4, rivet tailcone, VOR ant doubler,
static ports: 6.75 hours
Final drilled the F-1006A/B/C bulkheads. Made a
doubler for the VOR antenna under the tail.
Positioned the antenna over my dropped bucking bar ding (you can see a
smaller one just forward of the antenna):
Placing the rivet holes in the doubler:
Test fit – looks good:
Outside placement looks good:
Scuffed the inside of the tailcone for the static
ports:
Prosealed up:
Inserted and taped until cured:
Outside:
4 OCT 15: Page 32-2 steps 5-8, 32-3 steps 1-4, 32-4 1-8: 9 hours
Dimpled the F-1006 A/B/C bulkheads. Clecoed and match-drilled the tailcone to the
fuse. Fuse is now just about the length
of the garage. Probably will have to go
diagonally when it comes time to hang the engine:
Match-drilling the bottom of the tailcone to the
fuse:
5 OCT 15: Page 32-5 steps 1-9:
3.75 hours
Dimpled the holes in the tailcone, bulkhead, fuse
skin joints. Riveted nutplates to the
flange on the F-1006B bulkhead. Riveted
the F-1006 A/B/C bulkheads together – no pics.
6 OCT 15: Wire run tabs:
1.25 hours
Made some tabs to eventually install inside the
fuse/for wire runs. Will probably
proseal them in place:
7 OCT 15: Page 32-5 steps 10-11, re-rivet tailcone: 3 hours
Riveted the F-1006B bulkhead to the F-1029 bell
crank ribs, re-riveted the tailcone top skin, and clecoed the tailcone to the
fuselage – no pics.
12 OCT 15: Page 32-5 steps 12-16, 34-3 steps 1-4, 34-4 1-2: 4 hours
Started riveting the tailcone to the fuse:
Marked and cut the hinge for the baggage door,
deburred the door parts, and countersunk the holes in the door hinge. Marking the rivet holes in the door hinge:
14 OCT 15: Page 33-2 steps 1-10, 33-3 steps 2-9: 4 hours
Match-drilled rear seat floors and baggage
floors. Floors installed:
Drilling the F-1027 close out panel into the baggage
floor:
15 OCT 15: Page 33-4 steps 2&6, drilled holes for conduit
through bulkheads: 1 hour
Removed floor panels and final-drilled #40 the holes
in the aft flange of the baggage floors – no pics.
16 OCT 15: Page 33-4 steps 3-5:
1 hour
Final-drilled the stiffeners to the baggage floors –
no pics.
17 OCT 15: Page 33-4 step 6, step access panels: 3.5 hours
Cut access panel holes in each baggage floor over
the steps:
Finished
deburring all the parts. Finally have a
pile ready for priming – means I’ll soon be riveting structure together again!