1 JUN 15: Page 28-10 step 13: 1.25 hours
Finished dimpling skins – no pics.
2 JUN 15: Page 28-11, page 28-12 step 1: 3.25 hours
Riveted the forward fuselage ribs, fuel filter
brackets and flo-scan mount to the F-1072 bottom skin:
3 JUN 15: Page 28-12 steps 1-2: 1.75 hours
Riveted the aft tabs of the floor ribs to the
forward fuse bulkeads – no pics.
4/7 JUN 15: Page 28-16 steps 1-2: 4.75 hours
Match-drilled, deburred, prekoted, primed, and
riveted the mid seat rail supports:
8-10 JUN 15: Page 28-13 step 2: 5.75 hours
Riveted the flanges of the forward fuse ribs to the
forward fuse bottom skin. Riveted the
F-1043C-L/R attach angles to the forward fuse bulkheads, riveted the forward
tabs of the fuse floor ribs to the firewall bulkhead. Sealed the firewall with 3M Fire shield. Nice bead at the bottom of the firewall:
Also sealed the recess and heater boxes:Back side:
Starting to come together!
11-12 JUN 15: Page 28-13 steps 3-4, built fuse stand legs: 8
hours
Bolted the forward center bulkhead assembly to the
F-1048L/R forward fuselage ribs and riveted the web to the ribs:
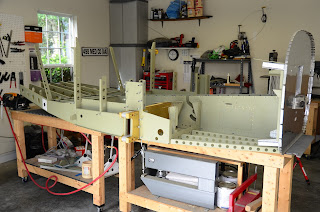
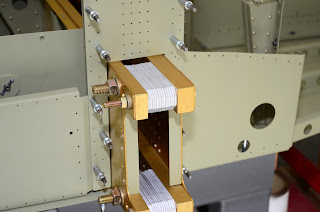
Mated the mid fuse to the forward fuse assembly:Installed the spacers and temporary bolts to the bulkheads:
Spent the rest of the session building leg stands so I can move my workbenches to rivet the bottom skin. When I get further into the fuse, I’ll cut the legs shorter to get the fuse lower to the ground:
13 JUN 15: Page 28-14 steps 1-3: 6.5 hours
Riveted the bottom flanges of the aft and forward
center section bulkheads to the bottom skins. This was very slow going
solo. It’s crazy how difficult riveting
seemed initially and now I do it in all kinds of crazy angles. Serious stretch:
The outboard 7 rivets on each side are double flush
so not to interfere with the gear mounts:Legs off and fuse back on the workbench. Headed out to Texas to take my ATP-Helicopter check ride, so this is where it will sit for the time being:


No comments:
Post a Comment