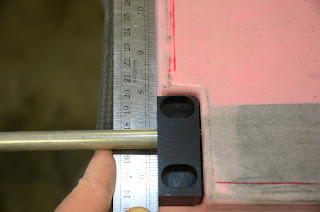
1 FEB 17: Countersunk screws/installed PlaneAround gear box: 1
hour
Completed the install of the PlaneAround gear box
and countersunk screws. This took me a
seriously long time to get to this point!
It was a bit confusing following 3 sets of instructions at the same time
– the second door will go together much quicker! My countersink job is a little shoddy 😯 and
my cut for the gearbox cam isn’t exactly centered, but I’m going to glass over
everything and then cover the door eventually, so I’m not too worried about it.
Installed the van’s pin blocks to get the correct
screw hole placement and then fit the PlaneAround pin blocks. You have to install the Van’s blocks first
because the PlaneAround are oversized.
They use the same bolt holes, so once you have the Van’s installed, it
is just a matter of sanding the PlaneAround blocks to fit the space in the
door:
I’ll say it again, this took WAY longer than I had
imagined!!
8 FEB 17: Cut and tapped rod ends, installed PlaneAround angled
pins: 2.5 hours
Cut the door rods to size to accommodate the extra
length of the PlaneAround angled pins and then tapped the rods for the threaded
inserts to attach the pins. Will have to
Loctite the inserts into the rods, but won’t do that until final fitting when I
know everything is in its final position.
I’ll also have to epoxy the magnets inside the pins for the Van’s door
latch switches:
I received the new angle stock from Van’s and set
about match drilling it. This was a bit
nerve-wracking as there are a lot of holes on each face and they all have to
line up perfectly for me to reinstall the angle and, more importantly, the
horizontal stabilizer, which I already drilled to the deck. I cut the old angle in half, sanded it flat,
and used it as a drill template for the new angle. Luckily, everything fit like a glove. The old top half of angle and the new
unprimed angle installed – the AN bolts fit just like originally through the
longerons:
Aft deck clecoed in place. Very happy everything fit nicely like
originally:
I then installed nutplates in the overhead console
for the cover plates. I have to order
some single-sided for the corners as I didn’t have any on-hand:
I then primed the console cover plates and new aft deck angle. Cover plates temporarily installed. I plane to keep the overhead raw carbon fiber – will eventually clearcoat it – and paint the cover plates beige to match the interior. I have ordered black screws as they will look nicer when the plate is eventually painted:
The new deck angle primed and ready for install. A lot of holes on each face, and a lot of opportunities for misalignment. I was extremely happy that everything fit back together very nicely!
12 FEB 17: Page 45-14 step 2, page 45-15 steps 1-3: 6.75 hours
Installed the cabin pin blocks in the door
jamb. In this pic of the aft block, you
can see where I trimmed the cabin top back a bit too much. No worries, as I will eventually fill that
entire area with epoxy/flox and final sand to shape:
I’m very pleased with the initial fit of the door:I will eventually do finishing epoxy work to make sure the door and cabin frame is level and to ensure a uniform door gap, but I’m quite pleased even with the initial fit:
13 FEB 17: Epoxy door strut bracket, begin to rivet back deck
back together: 4 hours
I’m using the PlaneAround strut brackets and wasn’t
please with my initial fitment. For
starters the angle of the holes wasn’t quite right, which made the screws
difficult to get started. Secondly, I
installed it too far inboard, which didn’t leave enough room for the door
seal. So I epoxied the holes and decided
to start over. Part of the difficulty is
that the bracket is angles, but the cabin top is rounded, so I decided to set
the bracket in a bed of flox to create a flat mounting surface. First covered the bracket in packing tape:
I then mixed up some flox and bedded in the bracket –
this time with a piece of door seal installed to get the proper spacing:
While that was setting up, I began to rivet the aft
deck back together. The angle that I
replaced riveted back to the bulkhead:
Front side:
I then began to rivet the top of the deck back into place – got about half way done and decided to call it a night:
With the flox cured, I removed the strut bracket. This will provide a much nicer (flat) surface to redrill the bracket to the cabin top:
16/17 FEB 17: Redrill strut bracket, install PlaneAround cam,
C/S door screws: 5.75 hrs
Much easier to install the bracket this time around
with the flat mounting surface:
18 FEB 17: Finished left door rough fit, finished aft deck
reassembly: 5 hours
I wasn’t happy with my initial placement of the
strut brackets on the door. It was
slightly misaligned, so when the door would was almost closed, it shifted
slightly aft making it difficult to shut the door. So, more flox… I feel like I do everything twice with the
doors. Second time around:
Second time around and the fit was right on. Still have to do the final fitting of the
McMaster-Carr door seal, and eventually do the final epoxy work on the
door/cabin joint, but I’m really pleased with how it is fitting with everything
together. Bottom edge:
Forward edge:
Aft edge:
Nice to see the door all together and installed:
Finished todays work session by completing the reassembly of the back deck. I dreaded pulling it apart, but I knew I had to replace that angle at some point. Glad to have it repaired and back together!


